Thursday, November 18, 2010

Problems with TortoiseSVN and authentication (on WinXP)

Newer versions of TortoiseSVN may produce errors when repositories reside on servers with unknown (untrusted, whatever) certificates. The very same repositories may be checked out and updated using a command line version (or with Mac tools). The error message may be a little too short and doesn't explain very much:
Update
OPTIONS of 'https://my.server.com/my/repository': SSL 
negotiation failed: Secure connection truncated (https://my.server.com)
Finished!
In order to fix this, you will have to change the underlying method of subversion/Tortoise for communicating with the server. This has to be specified in the server settings. This is a simple text file, hidden somewhere on your system. The easiest way of locating this file is by opening the Tortoise Settings and edit the "Subversion configuration file" (found under "General"). However, this only opens the "config" file, but what we need is the "server" file -- which luckily can be found in the very same folder as the "config" file. On my german Windows XP installation, its path is C:\Dokumente und Einstellungen\userid\Anwendungsdaten\Subversion\server. In "server" (pay attention to not accidentally add a ".txt" when saving the file), add a new server group in the group section, and set the http-library to "serf" for that group. E.g.,
[groups]
myserver = my.server.com

[myserver]
http-library = serf
Now, TortoiseSVN should work with your server.

P.S.: I found the solution at http://bugs.debian.org/cgi-bin/bugreport.cgi?bug=507374 (although I have no debian system, it solved my problem, so thank for the tip, Peter Samuelson) ;-). I adapted the solution for TortoiseSVN, as it fixes the problem with TortoiseSVN, and most TortoiseSVN forums suggest to downgrade to elder TortoiseSVN versions, which didn't worked in my case.


Tuesday, September 21, 2010

Mount Samsung GT-i5800 as an USB Drive

Today I wanted to sync some of my music files with my new GT-i5800. Unfortunately, it didn't worked with MissingSync via Wi-Fi, so I tried USB. Well, how do I mount my GT-i5800 as a USB drive on OS X? By default, USB settings are "Samsung Kies", which I do not need on OS X (and with MissingSync). This setting has to be changed to "Mass storage" before connecting the USB cable!
Settings > About phone > USB settings > (X) Mass storage (default: Samsung Kies)
or in german:
Einstellungen > Telefoninfo > USB-Einstellungen > (X) Massenspeicher
Only after changing this setting, you can connect the GT-i5800 as described in the Missing Sync manual: "pull down the notification window (aka ‘window shade’) and tap USB connected."

Well, and thanks to bTunes ($1.49), my Android device almost feels like an iPod :-D


Thursday, September 16, 2010

Android on Samsung GT-I5800 and Mac OS X

Eventually I had to admit being a geek. As a consequence, I'm an owner of a Samsung Galaxy 3 i5800 (or simply GT-I5800) now. I'm extremely impressed: This Android phone costs 200€ only, and frankly I don't know why to spent 1000€ for an iPhone. Moreover, to me the iPhone is a little bit too big. The i5800 is a little bit smaller, thus it better fits in my trouser pocket. OK, the camera (3.2 MP) is just good enough for funny apps such as the Barcode Scanner, but I do not really need a camera in my phone. As I'm an Mac OS X user, the most important thing is syncing with my MacBook Pro. This is really easy thanks to Missing Sync: Address Book contacts (with photos), iCal calendars, iTunes, iPhoto , arbitrary folders, SMS logs, phone logs, and other things (and in future versions bookmarks) are easily synced via WLan. It can be configured in order to sync automatically every n minutes via WLan or manually. IMHO, this app is worth it's 39$. Most of my friends have iPhones. So I knew about some great apps they demonstrated me on their gadgets. I'm really surprised finding all these apps available for Android as well and nicely working on my GT-I5800:
  • Dropbox for file syncing
  • 1Password password manager, can be used in combination with Dropbox!
  • Call-a-Bike, great for finding a free bike nearby.
  • Shazam to find out which song is currently played
  • DB Railnavigator
  • Remote for iTunes: With this app I have remote access to my iTunes library on my mac (via WLan), and thanks to my Airport Express I can now listen to my music w/o having to jump back to my computer (in another room) for selecting a new album. I can even select the speakers via this app.
Other applications for the daily information overkill:
  • I'm still not that happy with the browser (I tried the build in browser and Dolphin, and I probably will have to spend some time getting along with the latter one as it provides an ad-blocker and reader plugin).
  • For RSS, I installed gReader Pro. It uses my Google Reader settings, so that I do not have to configure all RSS feeds on the phone. Actually, it is one of the rare things I'm using my Google account for on my phone.
  • As a twitter client, I have installed Twidroyd Pro. Seems as if you have to pay a few bucks for good apps.
  • As I have mulitple mail accounts, I installed the K9 mail reader. It is free, and it does what it says.
However I'm not feeling comfortable with having my mail account passwords (and others) stored on the phone. Actually, the mail account password is one of the most sensible passwords. If one cracks the mail account, it is quite simple to change other passwords of web applications as most web apps sends you a new password if you have forgotten your old one. The lock method of Android 2.1 (which is not too secure, see this paper, however, PINs wouldn't solve that problem, would they?) may help, but I'm not really convinced about that issue. I definitely have to investigate further into that topic.

Monday, May 24, 2010

LaTeX: Listings and labels

I have blogged about the listing package here several times (nicely formatting, and hyphenations). This time I will write about creating labels inside a listing. First of all, the listing package allows to define a caption and a label for a listing, e.g.:
\begin{lstlisting}[caption={myListing},label={lst:myListing}]
void foo(int x) {
 doSomething();
 doMore();
}
\end{lstlisting}
Now the listing can be referenced via \ref{lst:myListing}. The listing package also nicely supports line numbers, there are a whole bunch of settings for that. But why do we need line numbers? In most cases, line numbers are used to refer to a certain line within a listing. E.g, we maybe want to write something like
In line 2 of the listing 1 we call method 'doSomething'.
Well, "listing 1" will look like "listing \ref{lst:myListing}" in the LaTeX source code, but how do we reference the line? Fortunately, the listing packages allows us to escape to latex inside a listing and add a label which can then be referenced:
\begin{lstlisting}[caption={myListing},label={lst:myListing},numbers=left,escapeinside={@}{@}]
void foo(int x) {
 @\label{lst:myListing_2}@doSomething();
 doMore();
}
\end{lstlisting}
Now we can reference the line: In line \ref{lst:myListing_2} ... Actually, you can use any label text, however I usually use the listings label with the line number or a small marker, in order to avoid conflicts with duplicate labels. As I do not want to write "line..." and "listing ..." over and over again, I use the autoref command from the hyperref package:
In \autoref{lst:myListing_2} of \autoref{lst:myListing}
autoref automatically adds a name to the reference counter. As there is no name defined for line numbers, it has to be defined previously:
\providecommand*{\lstnumberautorefname}{line} 
If you need names in a another language, you can add a translation:
\addto\extrasngerman{% 
\def\lstlistingautorefname{Quellcode}% 
\def\lstnumberautorefname{Zeile}% 
}
OK, we can add a line label and easily create a reference to that label. However, writing line labels means a lot of work, especially if you use a listing relative name pattern. So, let's add a macro to TeXShop, which uses some shell commands (mainly sed) and AppleScript in order to automatically create the label, even adding the line number to the label:
--Applescript direct
--
-- Create a label inside a listing, must be invoked at the position at which the label is
-- to be created.
-- Precondition: the listing is defined inside a lstlisting environment and 
--   a label is defined in the parameter list of the environment (label={..}).
--
-- New newly created label consists of the label of the listing with the line number
-- appended to the label. You can configure escape characters (as specified in
-- escapeinside={..}{..}) and the separator between listing label and line number.
--
-- E.g. label={myListing}, on line 5 leads to the following output:
-- @\label{lst: myListing!5}@
--
-- (C) 2010 Jens von Pilgrim, http://jevopi.blogspot.com

property texapp : "TeXShop"
property escapeLeft : "@"
property escapeRight : "@"
property separator : "_"
property maxLength : 2000

try
 tell application texapp
  
  if texapp = "TeXShop" then
   tell application "TeXShop" to set pos to the offset of the selection of the front document
   tell application "TeXShop" to set currentSelection to the content of the selection of the front document
  else if texapp = "iTeXMac" then
   -- ??
  end if
  
  set start to 1
  if (pos > maxLength) then
   set start to pos - maxLength
  end if
  
  set preceeding_text to (characters start thru pos of (the text of the front document)) as string
  set preceeding_text to my findAndReplace(preceeding_text, "\\", "_")
  
  set lineNumbers to do shell script ¬
   "echo " & the quoted form of preceeding_text & ¬
   "| sed -n '/label[:space:]*=[:space:]*{[^}]*}/=;$ {x;=;}'"


  set theLines to my splitLines(lineNumbers) -- as list
  set currentLine to last item of theLines as integer
  -- set startLine to item ((length of theLines) - 1) of theLines as integer
  -- length is not working when executed as macro... workaround:
  set startLine to first item of (rest of (reverse of theLines))
  
  set lstLine to currentLine - startLine
  
  set lastLabel to do shell script ¬
   "echo " & the quoted form of preceeding_text & ¬
   "| sed -n '/label[:space:]*=[:space:]*{[^}]*}/h;$ {x;p;}'" & ¬
   "| sed -n 's/.*label[:space:]*=[:space:]*{\\([^}]*\\)}.*/\\1/g;p'"
  
  set newSelection to escapeLeft & "\\label{" & lastLabel & separator & lstLine & "}" & escapeRight & currentSelection
  
  
  if texapp = "TeXShop" then
   tell application "TeXShop" to set the selection of the front document to newSelection
  else if texapp = "iTeXMac" then
   --tell application "iTeXMac" to insert new_section in the text of the front document
  end if
  
 end tell
on error errmesg number errn
 beep
 display dialog errmesg
 return
end try


on findAndReplace(strInString, strFind, strReplace)
 set ditd to text item delimiters
 set text item delimiters to strFind
 set textItems to text items of strInString
 set text item delimiters to strReplace
 if (class of strInString is string) then
  set res to textItems as string
 else -- if (class of TheString is Unicode text) then
  set res to textItems as Unicode text
 end if
 set text item delimiters to ditd
 return res
end findAndReplace


on splitLines(strInString)
 set ditd to text item delimiters
 set text item delimiters to "
"
 set textItems to text items of strInString
 set text item delimiters to ditd
 return textItems
end splitLines
Now things are really easy: Simply activate the macro at the appropriate location in the listing, and a new label will automatically be created. Note: The listing must have a label defined! You can configure the script by changing the properties at the beginning of the macro.

Tuesday, April 20, 2010

LaTeX: Lstinline and Hyphenations

I really like the LaTeX listing package. However, there is one serious problem: Hyphenations are not supported (Option breakline does not break words)! Fortunately I found a solution which is not 100% perfect, but almost (let's say 99% ;-) ). The idea is to use the replacement feature of listings in combination with the discretionary command. Actually, this is not my idea, its Andrei Alexandrescu's idea. I slightly modified his solution. So, here it is. Actually I define a new command for inline Java code -- you may do this using a style, but I prefer this one:
newcommand{\lstJava}[1]{%
\lstinline[language=Java,breaklines=true,mathescape,%
literate={\-}{}{0\discretionary{-}{}{}}]§#1§}
As '§' is rarely used in Java, I use this character as code delimiter in lstinline. Also, '$' is seldom found in Java code, so I activate mathescape by default as I use it from time to time (that is, more often then '$' in Java). Now, the trick is the literate option. It is used to replace a string in the code with another given string. So, the well known \- - command (telling LaTeX where to hyphenate a word) is replaced here! And it is replaced by the \discretionary command. This one tells LaTeX, how to hyphenate a word, which is especially useful in German writings, where "ck" becomes "k-k". We use this command here to output the hyphen only when necessary. With this command, hyphenation is working within lstinline -- however you will have to mark it manually.
Let's have a look at a rather long Java class, called \lstJava{ThisIsA\-VeryLong\-ClassName}.

Sunday, April 18, 2010

Create BibTeX Entry from Safari Document with BibDesk

I often have to reference webpages from my papers. I use bibtex and in order to reference a webpage I define a new bibtex entry of type webpage. Since I do not want to type in these entries manually, and thanks to BibDesk, a small applescript does the trick for me:
-- (C) 2010 Jens von Pilgrim
tell application "Safari"
 set theTitle to name of front document
 set theURL to URL of front document
end tell

set theDate to (year of (current date)) & "-"
set theMonth to (month of (current date)) * 1
if theMonth < 10 then
 set theDate to theDate & "0"
end if
set theDate to theDate & theMonth & "-"
set theDay to day of (current date)
if theDay < 10 then
 set theDate to theDate & "0"
end if
set theDate to (theDate & theDay) as text

display dialog "Key for webpage " & theTitle & ": " default answer ""
set dlgResult to result

if (button returned of dlgResult = "OK") then
 set theKey to text returned of dlgResult
 
 tell application "BibDesk"
  if (count of documents) = 0 then make new document
  
  tell document 1
   set newPub to make new publication at end of publications
   set type of newPub to "webpage"
   set cite key of newPub to theKey
   set the value of field "Key" of newPub to theKey
   set the value of field "Type" of newPub to "URL"
   set the value of field "Url" of newPub to theURL
   set the value of field "Lastchecked" of newPub to theDate
   set the value of field "Title" of newPub to "{" & theTitle & ", Project Website}"
   
   show newPub
  end tell
  
 end tell
end if
This script grabs the URL from the currently active Safari document and creates a new bibtex entry. Some field are automatically filled, including "Type" which is required by some styles I use.The script asks for the key of the new entry, as this cannot be determined automatically (at least, I don't want the script to make a false guess). I added the script to the BibDesk script folder (at ~/Library/Application Support/BibDesk/Scripts), so it is accessible from within BibDesk. Example: The script produces for http://bibdesk.sourceforge.net/ the following entry:
@webpage{BibDesk,
 Date-Added = {2010-04-18 13:40:38 +0200},
 Date-Modified = {2010-04-18 13:40:38 +0200},
 Key = {BibDesk},
 Lastchecked = {2010-04-18},
 Title = {{BibDesk, Project Website}},
 Type = {URL},
 Url = {http://bibdesk.sourceforge.net/}}

Convert Text to a (TeXShop) Convenient Label

TeXShop support smart selection of words. If you double-click a text, the whole word is selected. A word in TeXShop consists of the letters 'A/a' to 'Z/z' and underscores. Spaces and hyphen '-' are not interpreted as word but as whitespaces separating words. With BibDesk installed 1), you can press the F5 key within a \ref-command and a list will pop up with all the labels defined in your text.
If you want to quickly select a label in order to copy and paste it manually to a reference (e.g., if you do not use \ref but \autoref instead, the latter is not recognized as reference command by BibDesk), spaces and hyphens (and other punctuation characters) are really annoying as you cannot simply select the label using a double click. Even more annoying: If a label is selected from the proposal list (activiated via F5), only the label characters before the first space or punctuation character are pasted.
For that reason I do not use whitespaces or punctuation characters in labels. Since I do not want to convert all characters myself, I have added a new macro to TeXShop (with a nice shortkey on Cmd+'_') which does the trick:
--Applescript direct

-- Converts spaces and punctuation characters to underscores, useable for labels
-- (C) 2010 Jens von Pilgrim
tell application "TeXShop"
set snippet to the content of the selection of the front document
-- replace commands
set snippet to do shell script ¬
"echo " & the quoted form of snippet & ¬
" | sed -E 's/([[:space:]]|[[:punct:]])/_/g'"
set the selection of the front document to snippet
end tell
Note: In a previous posting, I published a macro creating section headers automatically. I have improved this macro in order to convert the whitespaces and punctuation characters in labels as well.
1)Thank you, Herb Schulz, for reminding me that it's BibDesk which adds the completion list to TeXShop ;-)

Tuesday, April 6, 2010

BBL to BIB with BibDesk

BibDesk manages my bibliography, just like iTunes manages my music. I have a single iTunes library, and I also have only a single master bibliography. However, when writing a paper, I want to create a new bib file with only the publications cited in the paper. BibTeX nicely creates a bibliographic reference file (*.bbl), but I want a bibliography file (*.bib) in order to be able to open the paper related publications with BibDesk. So, what I needed was a tool to convert the bbl file into a bib file. Fortunately, I found everything for that on my machine: AppleScript, grep, sed and, of course, BibDesk. I wrote a small script which simply creates a new bib file using a source bib file and a selected bbl file. Simply install the script listed below to your script folder (~/Library/Scripts) and name it "Create BIB from BBL.scpt" . Open your master bib file with BibDesk, then select a bbl file and activate the script(from the script menu in the menu bar). It will automatically create a new bib file in the folder of the bbl file, with the same name as the original bbl file (but with the extension bib).
-- Creates a new bib-file from an bbl-file using BibDesk -- (C) 2010 Jens von Pilgrim -- Version: 1.1, 20100615 tell application "Finder" set selectedItems to the selection end tell if ((count of selectedItems) = 0) then display dialog "Please select at least one bbl file" buttons {"OK"} return end if -- retrieve master bib file set sourceDoc to "" tell application "BibDesk" if (count of documents) = 0 then display dialog "Please open the source bibliography with BibDesk" buttons {"OK"} return end if if (count of documents) > 1 then set listOfNames to {} as list repeat with doc in documents set listOfNames to listOfNames & name of doc end repeat set selected to (choose from list listOfNames) as string repeat with i from 1 to the count of documents set doc to (item i of documents) set strDocName to name of doc as string if (strDocName is equal to selected) then set sourceDoc to document i log "source doc set" end if end repeat if sourceDoc is equal to "" then return end if else set sourceDoc to document 1 end if end tell -- log "copy items from master bib file" -- convert all selected bbl files repeat with theItem in selectedItems set theFile to theItem as alias set posixpath to POSIX path of theFile if (offset of ".bbl" in posixpath) > 0 then set destPosixpath to (my rename(posixpath, "bbl", "bib")) set destFile to POSIX file destPosixpath tell application "Finder" if (exists destFile) then set rep to display dialog "File " & destFile & " already exists. Overwrite?" buttons {"Yes", "No"} set skip to (button returned of rep = "No") else set skip to false end if end tell if (not skip) then -- log "examine bbl file " & quoted form of posixpath -- actually, this is the most important line: set allCites to do shell script "grep -E \"\\\\\\\\bibitem[:space:]*(\\[[^]]*\\])?[:space:]*{([^}]*)}\" " & (quoted form of posixpath) & " | sed -E \"s/\\\\\\\\bibitem[:space:]*(\\[[^]]*\\])?[:space:]*{([^}]*)}/\\2/\"" set numberOfItems to length of paragraphs of allCites if numberOfItems = 0 then display dialog "No bibitems found in " & posixpath & ", maybe the file does not contain any bibitems or the search pattern does not recognize your file format." buttons {"Too bad."} else set numberOfMissedItems to 0 set missedItems to "" tell application "BibDesk" set destDoc to make new document repeat with cite in paragraphs of allCites set bibs to search sourceDoc for cite set bFound to false repeat with bib in bibs set strFoundKey to cite key of bib as string set strCite to cite as string if strFoundKey is equal to strCite then -- log strCite & " found, add to new bib" set newBib to make new publication at end of publications of destDoc duplicate bib to newBib set bFound to true end if end repeat if not bFound then set numberOfMissedItems to numberOfMissedItems + 1 if (numberOfMissedItems > 1) then set missedItems to missedItems & ", " end if set missedItems to missedItems & cite end if end repeat save destDoc in destFile end tell if numberOfMissedItems > 0 then display dialog "Did not found " & numberOfMissedItems & " out of " & numberOfItems & " items: " & missedItems & "." buttons {"Uups"} end if end if end if else display dialog "Can only extract bib entries from BBL file, was " & posixpath end if end repeat -- this sub-routine just comes up with the new name on rename(item_name, item_ext, new_extension) set the trimmed_name to text 1 thru -((length of item_ext) + 2) of the item_name set target_name to (the trimmed_name & "." & new_extension) as string return the target_name end rename
If you don't have BibDesk, you might want to have a look at Michael Zhang's Perl Script. Instead of parsing the bbl file, Zhang's script parses the latex source. I prefer parsing the bbl file, as sometimes I use a whole bunch of latex sources, and BibTeX is quite good in gathering all citations into a single bbl file. You may also want to read the comments to Zhang's post for other solutions. If you don't have a master bib file, you may look at http://www.tex.ac.uk/cgi-bin/texfaq2html?label=makebib. There's a perl scrip provided reconstructing a bib file from a bbl file only. Update 2010-06-15: I updated the script as some BBL files were not recognized. If the script doesn't work, you may have a look at your BBL file. At the moment, the script searches for bibitems like "\bibitem{key}" or "\bibitem[abbr]{key}".

Tuesday, March 23, 2010

Nicely formatted listings in LaTeX with adjusted fonts

I'm using the listings package in order to get nicely formatted listings in latex. Since many people are used to the fonts and syntax highlighting of their IDE, I tried to emulate the layout and colors of code as it is formatted in Eclipse. Thanks to XeTeX, I'm able to simply change the font in listing as well. I use two fonts for listing paragraphs and inline:

\newfontfamily\listingsfont[Scale=0.7]{Courier} 
\newfontfamily\listingsfontinline[Scale=0.8]{Courier New} 
This enables bold fonts in typewriter, another way of solving this problem is to use LuxiMono, but I haven't tried that one. Then I define the colors Eclipse uses, comments are defined a little bit darker:

\usepackage{color}
\definecolor{sh_comment}{rgb}{0.12, 0.38, 0.18 } %adjusted, in Eclipse: {0.25, 0.42, 0.30 } = #3F6A4D
\definecolor{sh_keyword}{rgb}{0.37, 0.08, 0.25}  % #5F1441
\definecolor{sh_string}{rgb}{0.06, 0.10, 0.98} % #101AF9
Sometimes I need math text in listings, e.g. when writing pseudo code. Since I scaled the fonts down, the normal math fonts (displaystyle) are a little bit too large. One possible solution of resizing the math fonts would be to use \DeclareMathSizes, however I do not want to change the font for the whole document. The listings package provides two properties "escapebegin" and "escapeend", which are inserted before and after escaping to latex or math. However, simply using escapebegin={\ \scriptstyle} would cause errors when escaping not to math but to normal latex mode. In order to solve that problem, I define a custom command:

\def\lstsmallmath{\leavevmode\ifmmode \scriptstyle \else  \fi}
\def\lstsmallmathend{\leavevmode\ifmmode  \else  \fi}
Now I'm ready to define the overall style for listings:

\lstset {
 frame=shadowbox,
 rulesepcolor=\color{black},
 showspaces=false,showtabs=false,tabsize=2,
 numberstyle=\tiny,numbers=left,
 basicstyle= \listingsfont,
 stringstyle=\color{sh_string},
 keywordstyle = \color{sh_keyword}\bfseries,
 commentstyle=\color{sh_comment}\itshape,
 captionpos=b,
 xleftmargin=0.7cm, xrightmargin=0.5cm,
 lineskip=-0.3em,
 escapebegin={\lstsmallmath}, escapeend={\lstsmallmathend}
}
Comments are printed italic for black-white prints. In order to simplify the use of \lstinline, I define some commands for my favorite languages, e.g.,

\newcommand{\lstJava}[1]{\lstinline[language=Java,breaklines=true,basicstyle= \listingsfontinline]$#1$}

Example


%:lst:Test
\begin{lstlisting}[language=Java, caption={Just a test}, label={lst:Test}]
package de.jevopi;

/*
 * This is my class
 */
public class Test {

 public void foo(String s) {
  System.out.println("Hello " + s);
 }

}
\end{lstlisting}
will produce the following output (on the left). On the right, you can see the Eclipse version of the very same code snippet. (Click to enlarge images)

Thursday, March 4, 2010

Spell Checker, LaTeX, and OS X

Spell checking is a standard feature today. With LaTeX however it is not too easy to achieve. You can certainly use the build-in spell checker of OS X, but then you have to "proof read" all LaTeX commands and their parameters, which can be annoying. So I was looking for a better solution.

Because it was automatically installed I tried Excalibur. Frankly, I don't like it at all, but maybe I have missed something. It only offers very limited options. Unfortunately it doesn't support UTF-8. Since I'm using XeTeX wiht UTF-8, a spell checker w/o UTF-8 support is useless for me.

So I tried Aspell. If you look at the Aspell webpage, you'll get this "Linux users have to compile their application" feeling. There is a darwin port of aspell triggering a "Darwin users have to compile their application" feeling...

Fortunately, I eventually found CocoAspell. (Yes, well, there's a link to it on the TeXShop website ;-) ...) It comes with an installer, so you don't have to install XCode or Fink :-D. Best of all, it installs a system preference panel -- and that's really great! With this filter shown in the screenshot you can define LaTeX commands and if their arguments are to be spell checked. For example, the argument of \section{} is to be spell checked, while labels (\label{} ) are not to be spell checked. It comes with a list of predefined commands, and I added some commands, e.g., \autoref{} (as you can see in the screenshot).

You can find dictionaries at ftp://ftp.gnu.org/gnu/aspell/dict, before downloading them read the hints at cocoAspell's webpage.

I had some problems activating the Aspell dictionaries in TeXShop. Of course, you have to activate the dictionary in cocoAspell's prefernce panel. And I had to deactivate the "check spelling" box in the TeXShop preference, I don't know why. Spell checking is activated in TeXShops edit menu, I don't know what this preference setting is good for...

Well, spell checking a document for the first time usually means to add a lot of word to the dictionary. Sometimes, you want to edit this user dictionary (maybe because you added a word by mistake of because you want to add an existing list). The user dictionaries can be found at ~/Library/Spelling. These files are simple text files and you can open and edit these files with almost any editor. However, the words are separated with an usually invisible character, so you have to use an editor which can show invisible characters, such as SubEthaEdit (unfortunately, TeXShop cannot show these characters).

OK, now that we have a nice spell checker for LaTeX, we only have to change the language in "Spelling and Grammar". However, opening that tiny window requires a bunch of mouse clicks, and often we do not want to actually spell check but only change the dictionary. I found a small applescript at maxoxhints forum, and the version provided by Eponymous works for me. Eponymous' script could be added to the apple script menu and then will be available in all applications. Note: In order to make this script work, you have to activate "Enable access for assistive devices" in the "Universal Access" panel of the system preferences.


Tuesday, March 2, 2010

Create Section Headers with TexShop and Applescript

I really like the macro feature of TexShop. One of the most common use cases of macros would probably be the definition of a section (or subsection etc.). My section-creation-macro has been quite simple in the past:

% ----------------------------------------
% \section{#SEL##INS#}
% \label{sec:#SEL#}
% ----------------------------------------
This small snippet creates a nicely formatted section header including a label. However, there's a really annoying problem: When creating a reference to a section (that is, to its label), TeXShop does not handle spaces accordingly when selecting a label from the dropdown list. For example, if your label is something like \label{sec:Hello World}, the complete label is shown in the list, but only \ref{sec:Hello} is inserted into the text. In order to overcome this problem, I always replace spaces in labels with underscores. So my label would be "sec:Hello_World", and TeXShop is working perfectly. But replacing spaces with underscores by hand is even more annoying. So I replaced my section macro with an applescript version:

--Applescript direct

-- Create a section header from selected text. A label is automatically added with a prefix
-- "sec:", spaces are converted to underscores.
-- (C) 2010 Jens von Pilgrim

property level : "section"
property cmtchar : "-"
property cmtlength : 78
property labelprefix : "sec:"
-- property newline: "\n"
tell application "TeXShop"
 
 
 tell application "TeXShop" to set title to the content of the selection of the front document
 
 set new_title to title
 if ((count of the paragraphs of title) ≥ 1) then
  set this_line to paragraph 1 of title
  set label to this_line
  set add to "true"
  
  -- replace commands
  set label to do shell script ¬
   "echo " & the quoted form of label & ¬
   " | sed -E 's/([[:space:]]|[[:punct:]])/_/g'"
  
  set comment to "% "
  repeat with ii from 1 to cmtlength
   set comment to comment & cmtchar
  end repeat
  
  set new_title to ¬
   comment & return & ¬
   "\\" & level & "{" & title & "}" & return & ¬
   "\\label{" & labelprefix & label & "}" & return & ¬
   comment & return
 end if
 
 tell application "TeXShop" to set the selection of the front document to new_title
end tell
This macro creates a section just like the initial macro version, but this time spaces are automatically replaced in the label. That is, simply select your section title, activate the macro, and you get a nicley formatted title with a TeXShop compatible label. E.g. Mark
Hello World, this is great
and the macro will convert this to
% ==============================================================================
\section{Hello World, this is great}
\label{sec:Hello_World__this_is_great}
% ==============================================================================
You can easily adjust the macro in order to create subsection, subsubsections or chapters as well. I have different kind of comments for different section levels, all you have to change are the properties in the first line:

...
property level : "section"
property cmtchar : "-"
property cmtlength : 78
property labelprefix : "sec:"
...
Change level to "subsection" or whatever, and set the cmtchar to "*", "." or whatever you like. Changing a section level has already been subject of another blog post: Increase/Decrease Section Level with TeXShop Macros.

Friday, January 29, 2010

OmniGraffle and multi-language diagrams

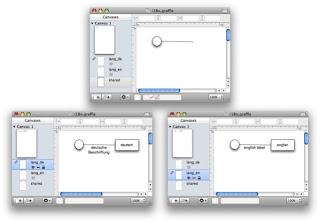
Sometimes I need diagrams in different languages for different purposes. E.g., for presentations on international conferences, I use english labels, while I need german labels for my thesis (which is written in German). I sometimes change my diagrams, I don't want to have two version of a diagram, one in english, another one in german. Because I always export my diagrams to PDF, I'm using two smart export scripts in conjunction with layers, used for internationalization (i18n). First of all, I add a layer for each language. In order to distinguish these internationalization layers from other layers, I use a prefix "lang_". All language specific labels and elements are added to that layer. Other things are placed on layers without my language prefix. Usually, I initially create the diagram in one language, and then move all language specific stuff to the language layer. I then copy all that language specific stuff and paste it onto another language layer (or, simply duplicate the layer), where it is translated. By changing the visibility of the language layers, I can change the language of the diagram. Since it is one diagram, changes on the shared layer are reflected in all language versions, language dependant things have to be adjusted (and translated) manually. The following screenshots show a sample diagram with three layers for shared, english and german elements. In order to create language specific PDFs, I have modified a script I published here some time ago. Here is the modified version:
-- converts selected OmniGraffle files to PDF with internationalization -- based on Greg Titus's script found at -- http://forums.omnigroup.com/showthread.php?t=106&highlight=export+applescript -- -- by jevopi, 2010 global export_language, layer_prefix set export_language to "de" set layer_prefix to "lang_" tell application "Finder" set these_items to the selection end tell repeat with i from 1 to the count of these_items set this_item to (item i of these_items) as alias set this_info to info for this_item -- insert actions here for: this_item set item_path to POSIX path of this_item set item_folder to (parent of (item i of these_items)) as string set item_name to name of (item i of these_items) set item_ext to name extension of (item i of these_items) set exp_name to my rename(item_name, item_ext, "pdf") set exp_path to item_folder & exp_name set msg to "Path: " & item_path & ", Exp: " & exp_path --display dialog msg buttons {"OK"} default button 1 my omniConvert(this_item, item_path, exp_path) end repeat -- this sub-routine just comes up with the new name on rename(item_name, item_ext, new_extension) tell application "Finder" if the item_ext is "" then set the trimmed_name to the file_name else set the trimmed_name to text 1 thru -((length of item_ext) + 2) of the item_name end if set target_name to (the trimmed_name & "_" & export_language & "." & new_extension) as string end tell return the target_name end rename -- this sub-routine does the export on omniConvert(source_file, source_path, target_path) with timeout of 900 seconds tell application "OmniGraffle Professional 5" -- save the current export settings so we can replace them later set oldAreaType to area type of current export settings set oldBorder to include border of current export settings set oldBackground to draws background of current export settings -- here is where you set the export settings you want set area type of current export settings to all graphics set include border of current export settings to false set draws background of current export settings to false set export scale of current export settings to 1 set border amount of current export settings to 0 -- open the file if it isn't already open set needToOpen to (count (documents whose path is source_path)) is 0 if needToOpen then open source_file end if -- do the export set docsWithPath to documents whose path is source_path set theDoc to first item of docsWithPath set allLayers to layers of first canvas of the theDoc repeat with i from 1 to the count of allLayers set theLayer to (item i of allLayers) -- repeat with theLayer in layers of first canvas of theDoc set theName to name of theLayer if (offset of layer_prefix in theName) > 0 then if theName = layer_prefix & export_language then set visible of theLayer to true else set visible of theLayer to false end if end if end repeat save theDoc in file target_path -- if the file wasn't already open, close it again if needToOpen then close theDoc saving no end if -- put the original export settings back set area type of current export settings to oldAreaType set include border of current export settings to oldBorder set draws background of current export settings to oldBackground end tell end timeout end omniConvert
This script exports an OmniGraffle diagram to PDF. Besides, only one language specific layer is made visible and the langauge id is added to the filename. The language is defined in line
set export_language to "de"
That is, this script automatically creates a german version of the diagram. I have a script for each language (and one w/o i18n) in my script folder, e.g. After applying the both i18n-scripts to the diagram, two PDFs are created from my diagram: This technique works pretty well with text and connection labels. Unfortunately labels placed on shapes cannot be moved on a layer different from the shape. So, in these cases you have to move the whole shape to the language layer. If you translate a diagram after you have created it, this works pretty well. It may become a little bit annoying if you have to change the diagram, but at least you are aware of the changes and don't have to work with two separate files.